Does your car have mysterious scratches and dents when you return to your parked car? Ever wonder if it’s vandalism or was it a hit and run?
You may be interested in a camera system which records while your vehicle is turned off. You’ll need a little more time in order to get it done. This guide covers what you need from equipment to installation.
Table of Contents
Pick a Dash Cam
You need a camera with an automatic parking mode with a capacitor for heat resistance. Ideally it should have good low light vision and be energy efficient.
Choose a Hardwiring Kit
A hardwiring kit connects your camera to your car’s battery through the fuse box. Most drivers should purchase a programmable device with a 12.2V cut-off setting.
Install Your Camera
You’ll need to install your hardwiring kit into your car’s fuse box. This requires you to identify the right circuits and pull fuses. Tools are required and some knowledge of electrical systems are helpful.
Parking Mode Overview
What is Parking Mode?
Parking mode is a fancy term for any recording done while your engine is off and your car is parked. The camera should have a special space-saving mode to minimize how much is written to the memory card while still capturing any accidents or vandalism.
Examples Where Parking Mode Helped
A learner driver drove too closely and broke their mirror. The owner was able to reclaim the deductible from their insurance company.
A man discovered his ex-girlfriend’s boyfriend pushed a cart into his vehicle after discovering a dent in his vehicle.
Is Parking Mode Worth the Time and Money?
We see parking mode as extra insurance for most people. How comfortable are you with risk and how much do you want to spend? If you’re in the minority where vandals are intentionally damaging your vehicle it could pay off right away (We suggest you look into CCTV cameras). For others it’s a personal decision based on a number of factors (budget, density, time, etc)
It Costs More Money to Do Well
The cheapest non-parking dash camera we recommend the A118-C costs $45. The cheapest parking setup we recommend (Thinkware F50 + Hardwiring Cable) costs $120 with lower video quality. Better setups cost $300 and up. Parking mode requires a camera that is heat resistant, energy efficient and reliable which costs more money. You will need to install the camera as well which requires electrical knowledge that may require a professional.
How Long Can You Record?
There’s no simple answer. There are many factors influencing recording time which include your battery size, voltage drop off, temperature and the energy efficiency of your camera. Using a safe voltage cut-off at 12.2V (more on that later) I got 7 hours of recording time using the Vicovation OPIA2 on my 2012 Honda Fit.
Larger vehicles will have larger batteries which extend recording time. Some cameras like the Blackvue DR650GW use more power. Drivers looking to extend recording time should purchase a temperature safe battery like the Cellink-B
Picking a Dash Camera
We wrote a general guide on how to pick a dash camera which looks at the features most people are looking for in a dash camera. There’s two features you need:
Automatic Parking Mode – Required
Parking mode represents a number of special features which saves memory card space while reliably capturing incidents that happen. To be effective your camera has to automatically enable/disable parked recording by detecting if you have stopped moving using the G-Sensor.
Should Be Easy to Use
On cheaper cameras you have to manually switch on/off this mode. If you leave parking mode on, you can lose footage while driving. Most people won’t always remember especially in a rush, which is why we think automatic parked recording is a mandatory feature.
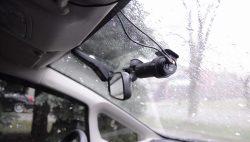 Great – Automatic Activation Uses the G-Sensor to detect if you have moved.
 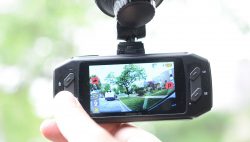 Not Good – Hardware Button Press a button to disable/enable parking mode. Very uncommon.
 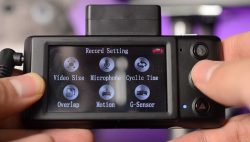 Poor: Menu Activation The most annoying and most common way of activating parking mode. Not Recommended.
Motion Detection Setting
Motion detection is the most popular parked recording mode. The camera is continuously recording to its memory so nothing is lost but only saves that video to the memory card when motion is detected.
Sensitivity AdjustmentIdeally you want a camera that can control the detection sensitivity so you can fine tune it to a setting where it captures people and cars but not smaller objects like birds.
Buffered RecordingIn advanced models the 5-10 seconds prior to the motion being triggered are also saved to the memory card. This is useful if motion is detected late or there are conversations happening off screen. Buffered recording is not required but it’s a nice feature to have.
Timelapse Mode
Timelapse records a video frame every 1/10/X number of seconds. This avoids any failures which can happen with motion detection especially under low light. The downside is that you may miss details like license plates depending on speed. As well no audio is captured which could identify people who may have damaged your vehicle.
G-Shock Trigger
In most dash cameras the G-Sensor is always running. When an impact is detected most cameras will switch back to normal recording.Capacitor Design – Required
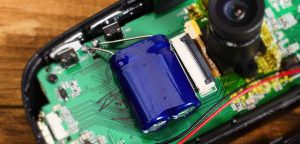
You need a camera that uses capacitors and not lithium ion batteries. While both have the same function to save videos after power is lost, capacitors are more reliable and far safer under hot weather. Due to the greenhouse effect your car can easily rise to 60°C in even mild temperatures. Lithium ion batteries wear down in hot weather and could be a danger.
High Temperature Limit
Most dash cameras have a max operational temperature limit of 60°C but for parked recording cameras we suggest a minimum 70°C operational limit unless you live in a cool location.
Nice Features to Have
Energy Efficient
A camera that uses less power is better especially for smaller vehicles as they have smaller batteries. You can record for longer without draining your battery as much. My Blackvue front/rear camera uses 30% more power compared to my single camera Vicovation OPIA2. That’s consistent with online reports. I’ll be doing a lot more testing over the next few months and I’ll release updates as I get them.
Partition Recording Space
Many Korean cameras like Thinkware or Blacksys will give you the option to partition different amounts of space for parked, normal and events like emergency recording.
Some users give more parked recording space which is useful as you may not be there to save the video. This offers protection against overwriting the file if you don’t notice the damage right away. With normal recording you are there to swap the SD card or transfer the files right away to your phone.
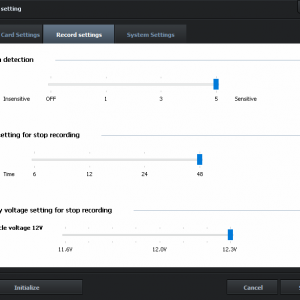
Built in Voltage cut-off // Thermal Protection
Some dash cameras come with a built in voltage-cut-off chip which means you can use a basic hardwiring kit saving you $20-$50. As well some have thermal protection which turns off the camera when a set temperature is exceeded.
Dash Cam Suggestions
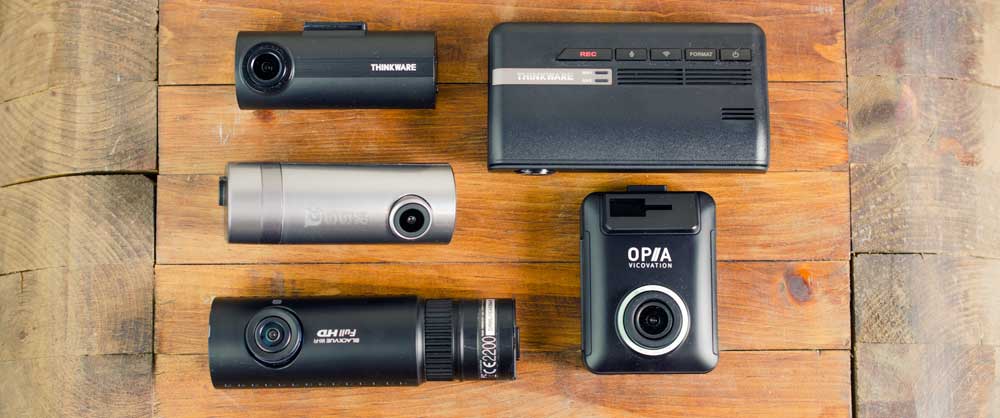
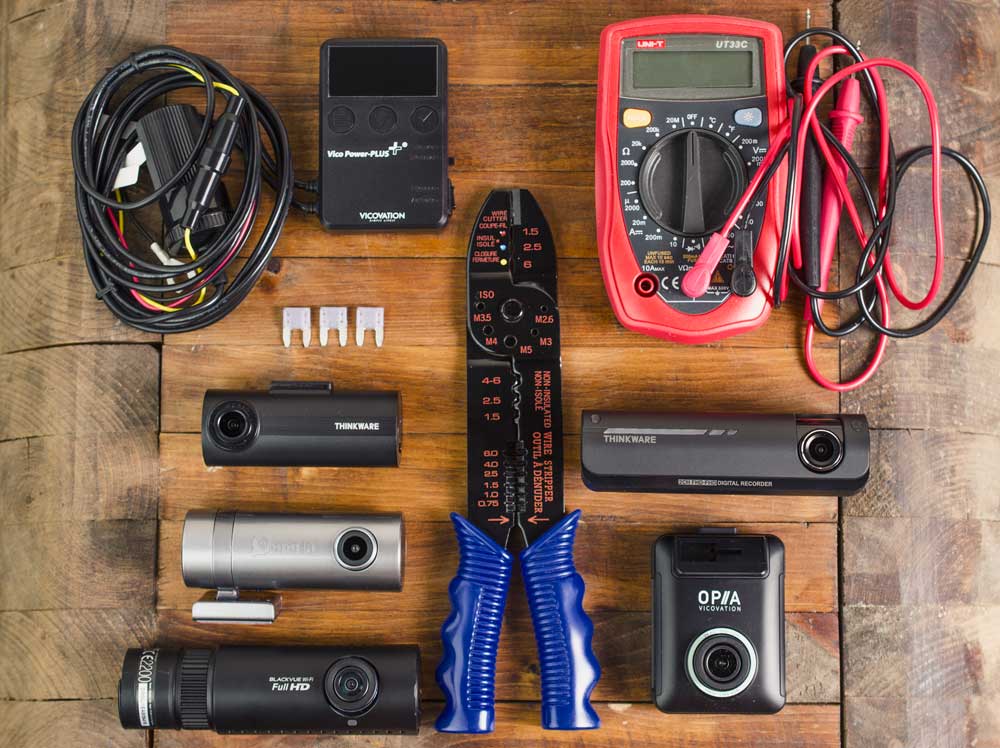
I haven’t done enough testing to say what are the top parking mode cameras. Looking online there are comparisons and reviews but not to my satisfaction. The suggestions I have here are pictured above and will be tested and reviewed in the weeks to come. The article will be updated with any findings I have.
Cameras I’ve Reviewed
Both are good parking mode cameras but I don’t know how great they are compared to other models on the market. So far I’ve been satisfied with both and each has unique features which you may find useful.
Best Dual Parking Dash Camera
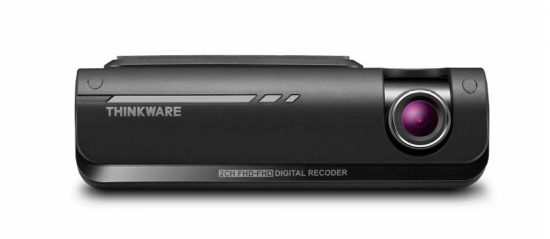
The F770 is our choice for anyone looking for a well made dual channel parking camera. It has the best in class video quality and is 23% more efficient than the Blackvue DR650 series cameras. There’s other features such as a video backup system that isn’t found on many cameras.
Read our Thinkware F770 Review
Hardwiring Kit Overview
A hardwiring kit connects your camera to your battery through the internal fuse box. Some of your vehicle’s circuits are constantly on such as your overhead dome light which you’ll need to draw power from when you turn off your vehicle. We’ll talk about installation methods later.
Three Types of Hardwiring Devices
Basic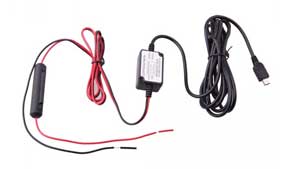
This is the wiring to connect your camera to your fusebox. It sometimes has a transformer or a voltage cut-off chip (11.6V which is useless. Not recommended in most cases.
Programmable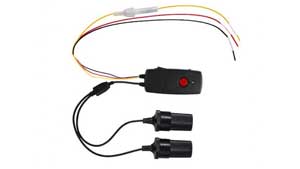
This is a user settable device which can cut-off the power when a time, voltage or temperature threshold has been reached. This protects the camera more than the simple kit.
Battery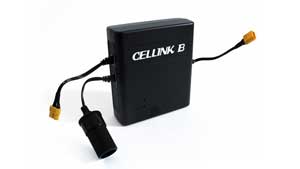
These use lithium iron phosphate to provide a safer, more temperature resistant battery to power your vehicle for extended recording. It’s still plugged into your fuse box and only charges when your vehicle is running, protecting your battery.
Avoid Deep Cycling Your Battery
Most vehicle batteries are starter batteries, designed to provide a large amount of current for a short period of time. Discharging more than 25% of its total capacity will start to deep cycle the battery. Deep cycling shortens battery life by creating problems like battery sulfation which is a build-up of lead sulfate crystals. For more information read this Wikipedia article

Battery Voltage = Battery Life Remaining
A fully charged 12V lead-acid car battery will measure 12.6V to 12.7V. As the battery is used voltage drops. At 11.5-11.7V your battery is dead. This means the 11.6V cut-off on many cheap devices is useless.
Safe cut-off Voltage
Some hardwiring kits allow you to set a voltage threshold which cuts power to your dash camera when it drops below the set number. A 12.4V cut-off is safest and will use up 7%-23% of the battery life depending on temperature.
A 12.2V cut-off is used by the MotoPark company who manufactures the Multi-Safer cut-off devices and also performs installations in Korea. 12.2V will use up 22% to 34% of the battery life and from their experiences has been very successful. From my research this is slightly less safe. However, my Blackvue DR650GW-2CH could only run well at this setting. I got 3+ hours at 12.2V but only 30 minutes at a 12.4V cut-off.
Voltage-Battery Life Chart
For anyone looking to find out the voltages associated with the percentage charge against temperature look below. Information taken from Battery FAQ.
| Temperature | Battery Life | |||||
| °F | °C | 100% | 75% | 50% | 25% | 0% |
|---|---|---|---|---|---|---|
| 43.0 | 12.661 | 12.461 | 12.251 | 12.071 | 11.901 | |
| 100 | 37.8 | 12.658 | 12.458 | 12.248 | 12.068 | 11.898 |
| 90 | 32.2 | 12.655 | 12.455 | 12.245 | 12.065 | 11.895 |
| 80 | 26.7 | 12.650 | 12.450 | 12.240 | 12.060 | 11.890 |
| 70 | 21.1 | 12.643 | 12.443 | 12.233 | 12.053 | 11.883 |
| 60 | 15.6 | 12.634 | 12.434 | 12.224 | 12.044 | 11.874 |
| 50 | 10.0 | 12.622 | 12.422 | 12.212 | 12.032 | 11.862 |
| 40 | 4.4 | 12.606 | 12.406 | 12.196 | 12.016 | 11.846 |
| 30 | -1.1 | 12.588 | 12.388 | 12.178 | 11.998 | 11.828 |
| 20 | -6.7 | 12.566 | 12.366 | 12.156 | 11.976 | 11.806 |
| 10 | -12.2 | 12.542 | 12.342 | 12.132 | 11.952 | 11.782 |
| 0 | -17.8 | 12.516 | 12.316 | 12.106 | 11.926 | 11.756 |
Basic Hardwiring Kits
A basic hardwiring kit can be as simple as wires which connect to your fuse and terminate with a female cigarette socket. It can be more complicated and include a transformer to replace the need for your car adapter and/or a non-programmable voltage cut-off. With all kits it should have an inline fuse to protect your car and camera from electrical damage.
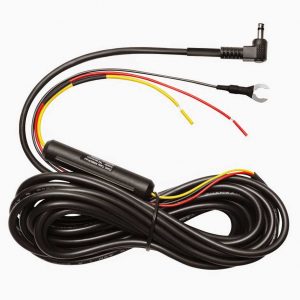
Thinkware hardwiring cable. No voltage cutoff, slim cylinder contains a fuse.
In most cameras a basic kit will completely drain your battery even with the voltage cut-off which is almost always set at 11.6V. You’ll lose money in roadside assistance fees, damaged batteries and lost time.
Good for Cameras with Onboard Voltage DetectionIf your camera has a built in cut-off circuit you can save money and use a basic kit. Some camera manufacturers require you to use their kit for warranty purposes. Otherwise, some retailers have their own quality hardwiring kits which may save you money. You can still use a programmable hardwiring kit instead if you need advanced features like thermal protection.
Programmable Hardwiring Devices
A programmable hardwiring device is the best choice for most drivers. Most kits offer timer and voltage cut-off settings higher than the useless 11.6V in basic kits. More advanced devices add features like temperature protection and a manual on/off switch.
VicoVation Vico-Power Plus
The power plus is my top pick because it has a number of useful features not found in other hardwiring devices. At $50 it’s well worth the $15 increase over the MultiSafer. I’m currently using this hardwiring kit which has replaced my PowerMagic Pro.
- LCD Screen: Rather than fumbling for DIP switches you can use buttons and see your settings on a screen. It also shows your current voltage.
- Voltage cut-off: Has the 12.4V voltage option for safer operation.
- Temperature cut-off (Exclusive): Set a temperature cut-off in 5C increments from 50C to 75C.
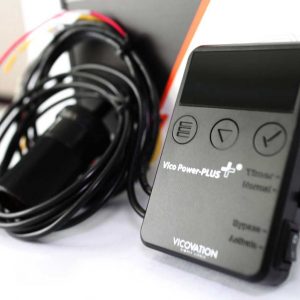
- Voltage Calibration (Exclusive): Sometimes the displayed voltage may be different than one read by a multimeter. You can make 0.1V adjustments in the Vico-Plus.
- Reboot After Startup (exclusive): A feature which restarts your camera after turning on your vehicle. Allows you to better detect any problems which may have popped up.
- Timer and Voltage cut-off: Can do simultaneous timer and voltage cut-offs, not just one or the other as with most hardwiring solutions.
Motopark MultiSafer
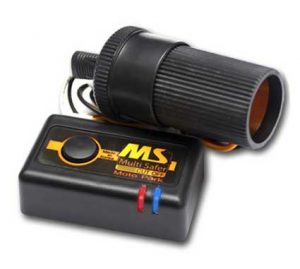
The $35 MultiSafer is a simpler device which uses DIP switches to control the voltage and time cut-offs. Compared to similar devices using this design it has the highest cut-off at 12.2V.
The MultiSafer was created to combat cheaper hardwiring kits which would restart the camera when the voltage dropped after turning off your vehicle. As well it has a maximum output of 8 amps which means you can hook up multiple cameras. However, it loses many of the unique features found in the Vico-Power plus.
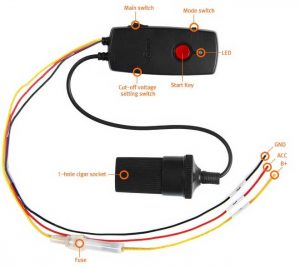
Lukas LK-290
As an alternative to the MultiSafer the Lukas LK-290 may be more widely available in countries like Australia. The Lukas is a different design but still uses the DIP switches found in the MultiSafer to control timer and voltage cut-off features. It has a higher 12.4V switch which is useful but lacks a 24V option unless you purchase the more expensive device.
Battery Hardwiring Kits
Dash cam specific battery packs use a special lithium iron phosphate material (LiFePO4) to increase the safety and reliability in hot weather. They’ll include a thermal protection switch to cut off power when it’s especially hot.
Charge Only While Your Car Is RunningInstead of pulling energy from your car’s battery it rapidly charge at 5-7Amps when your vehicle is on. That’s about 2-3X faster than your phone. The Celllink B can charge a 75 Watt-Hour battery in 1.5 hours while providing 25-30 hours of recording time.
Luxury Vehicles:Some Luxury vehicles like the 2013 BMWs and up may create an error when there is an unexpected power drain while the ignition is off. A battery pack device may offer the best compatibility. Google is your friend.
Battery Suggestion
There’s only one suggestion as there are few models on the market as it’s not a popular feature outside of Korea. Again I haven’t tested this battery yet but the information is gathered online and from trusted sources.
Cellink Battery B – $260
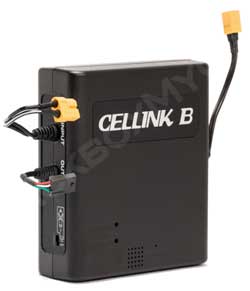
Likely the best battery on the market for dash cameras and the most widely carried among dash cam retailers. It has a huge 76.8 watt-hour battery which provides 20+ hours of recording time. It’s a well proven design and it has the option to plug into your cigarette power adapter for 5 amps charging or even faster directly wired in at 7amps.
Blackvue B-112 – Not Great Value
The BlackVue B-112 has half the capacity of the Celllink B at 38.4 Watt-Hours but it costs $30 lower at $230. I don’t see why anyone would get one.
USB Battery Packs
Note: We strongly recommend avoiding lithium-ion batteries.
These devices can hold a lot of power and are cheaper. For example the 79 Watt-Hour RAVPower recommended by The Wirecutter is $40 and is 5X cheaper than the Celllink B which stores the same amount of power.
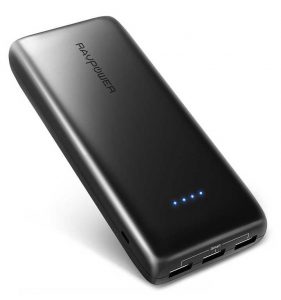
Even with high quality batteries these packs can be dangerous in even mild weather as the temperature inside your vehicle can rise to unsafe levels. Don’t charge these batteries inside your vehicle either. The charging temperature limit is 45C and even getting close to that temperature gives you an increased risk of fire other other damage. Under freezing conditions charging will also permanently damage the battery by plating the anode with metallic lithium.
They’re also inconvenient. When driving you’ll probably unplug the battery pack and switch to your charged outlet. You’ll also have to remember to take out your device and charge it at home every few days.
Installing a Camera
I am not a professional and I don’t play one on the internet. While I have done my best to ensure this information is accurate I cannot account for all situations. Hardwiring may permanently damage your vehicle. I am not responsible for any damages. You’ve been warned!
Step 1 – Locate & Identify Your Fuses
Find Your Fuse Box
Use your owner’s manual to identify the location of the internal fuse box. This is normally found in the driver’s side of your vehicle. You may need a tool to gain access.
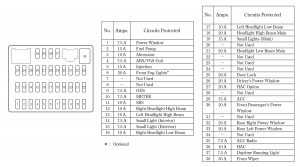
Next you need to find the fuse map which is a diagram describing what each fuse does and where it’s located in the box. This simplifies the process and ensures you don’t pull the airbag fuse, that’s bad.
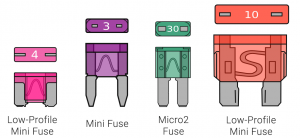
Finally you need to identify the type of fuse as depicted above. This is an optional step if you are using a fuse tap which we’ll explain next.
Step 2 – Add a Fuse Tap (Optional)
A dual circuit fuse tap provides a safer and more secure connection. Rather than wrapping a wire around a fuse leg you take the same wire and crimp it into the blue end of the fuse kit. You’ll need a crimper or needlenose pliers. This avoids accidental short circuits from a stray wire.
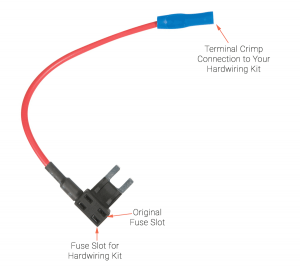
There are two fuse slots as it creates two separate circuits for safety. One is for the fuse you are replacing. The other is for your hardwiring device. You’ll want to purchase a smaller 2-3 amp fuse from your local autoparts store.
Step 3 – Locate a Constant and Switched Circuit
Using your map you will want to identify two circuits, one constantly live and one which switches off with the ignition. Some general advice is to avoid tapping into anything safety related such as airbags or brakes. A dome light is a common suggestion but in some vehicles it may turn off after 15 minutes.
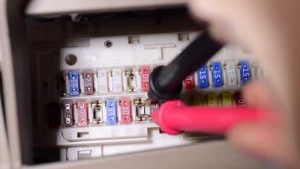
A multimeter may be useful to confirm that a circuit is powered. Avoid using a circuit tester in late model vehicles as it may damage the computer. On some vehicles tapping into the wrong circuit can result in a computer error. Your car will detect an unusual load, spit out a warning and shutdown power.
Step 4 – Install the Hardwiring Kit
Your vehicle should be off and ideally your should disconnect your battery as well. If your hardwiring kit has an on/off switch it should be set to off especially if your battery hasn’t been disconnected.
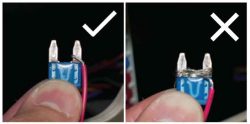
If you are not using a fuse tap, wrap the hardwiring wire tightly around the fuse leg. You’ll want to identify the side which stops receiving power if the fuse blows. This is where reading a forum or using a multimeter comes in handy. If you are using a fuse tap plug it into the circuit.
III – Ground the Hardwiring KitNext find an unpainted bolt or screw which is part of your vehicle’s body. Using a multimeter check it’s not attached onto plastic parts. Otherwise you can cause a fire or other serious damage (Note how many times we mentioned this, please be careful).
IV – Connect Your CameraIf your hardwiring kit ends with a female cigarette outlet you’ll want to plug in your dash camera’s power adapter. Afterwards it’s a matter of routing your cables to make it look clean.
You can see my video guide but it’s an older video. I would recommend pulling down the weatherstripping but that adds complications as you’ll want to avoid obstructing the airbag in newer vehicles.
Step 5 – Cleanup
You probably have wires and your hardwiring kit dangling everywhere. You want to secure your kit ideally out of sight and so it doesn’t fall and strain the connections.
Step 6 – Set Hardwiring Options
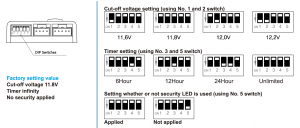
If you are using a programmable hardwiring kit you will want to set options like the voltage cut-off. Some cameras may have the voltage cut-off settings on the camera itself.
Installation Videos:
Hardwiring a Camera
Shows a number of steps which includes exposing the fuse box at 5:00 a Fuse-Tap at 5:20 and how to properly crimp your connection at 6:00.
Professional Installers
If after looking at the installation guide and you think professional help is better I would recommend finding an audio installer. They will have experience in safely and securely wiring your dash camera. As well they will have experience hiding wiring so that it looks neat and doesn’t interfere with airbag deployment.
Ideally they will have knowledge of dash cameras as there are some unique processes which may be helpful. I don’t have any suggested installers as it’s not a field I research. Local forums, car forums, friends and family would be good resources to tap into.
Knowledgeable Retailers
If you’re looking to DIY and want from help from retailers who have experience doing their own installation.

BlackBoxMyCar is our recommended retailer for the F770 because they have extensive experience in hardwiring luxury vehicles. For example some BMWs will spit out an error message if you tap the wrong circuit. I’m happy to admit where I’m not an expert, go ask them for hardwiring advice. Check out their Instagram to see some of the vehicles they’ve worked on. They also have a YouTube channel which has product reviews and guides on installation.
See BlackBoxMyCar.comSee their Amazon Store

The DashCamStore has been around for quite a number of years. They published a great guide to hardwiring your camera. Here’s photos of some of their installations. On their page they have a number of vehicles they have installed.
They only sell the Blackvue BlackMagic hardwiring kits and their own line of hardwiring devices which are both expensive and don’t have a voltage cutoff. One of the few kits made in the USA if that matters to you.
Australia/UK/Europe
I have not seen a dashcam retailer in these regions who does installations themselves. There are some installation shops such as MC Car Security in Australia who are service first and retailer second. Let me know if you find any great retailers

Hi Andrew,
One camera I’m thinking of as both a rear camera and because it rotates 360 degrees, possibly also a parking camera, is the Goluk T3. A problem with normal front facing camera in parking mode is they’re only going to see and record what’s in front of them. Seems to me a camera at the rear of the car facing the front would also be able to pick up anything happening on the sides. Or am I mistaken about this.
Richard
Hey Richard,
It may have the angle but there may not be enough details. As well the difference in exposure (dark car interior, bright outside) may mean either the interior or exterior is unclear. You would also have to crawl into the back in order to turn it around each time and most people would not have the patience to do that. You could use two cameras.
That is something I should test out in the future.
Andrew
Hi Andrew,
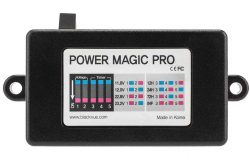
This is a great informative guide on dashcams. I’ve noticed the cutoff voltage on newer batches of the Power Magic Pro have been changed to 12V and 12.5V. There are plenty of screenshots on eBay listings so you can verify this. Would the change make this product recommended?
Hey Vti07, thanks for letting me know! I wouldn’t recommend it still. 12V can be too low in certain temperatures and 12.5V is 5-10% only which is way too high for most people.
A great guide, thank you! However, I’m curious if anyone has any recommendations on a “set it and forget it” camera system that can be hardwired to use car power, avoiding any need to manually power up anything and get rid of unsightly USB camera cables and connectors. I’m thinking of something like a base station hidden away somewhere that records a remote camera (via wire) set up behind the rear view mirror?
I don’t mind spending money for a good set up that I can put my faith into.
There’s really no such thing at this moment that doesn’t use any cables. At the end of the day a remote camera will still require power for the base station and the routing to the windshield.
I don’t consider any dash cam not reviewed by you. Thank you for your amazing work!
Thanks Stefano!
The Mini2 doesn’t have GPS and DOES have motion detection – your guide suggests the opposite?
Whoops need to change that. That’s why it’s in the promising section. It’s being tested now but I haven’t revised the page. Never mentioned it had motion detection though. GPS was a mistake.
Hi Andrew, appreciate your hard work with providing invaluable information and tips. Bought two A119s for front and rear of car. Is it possible to use one VicoVation Vico-Power Plus for both dash cams? If not is there another hardwiring kit that is just as good as the Vico-Power Plus that can connect to two cams? Thank you in advance.
Hi Kevin, you sure can. I’d get a splitter like this one which allows you to plug in two cameras. As well the A119 sips power at 0.16A each so it’s well under the 2A limit.